
Google Workspace
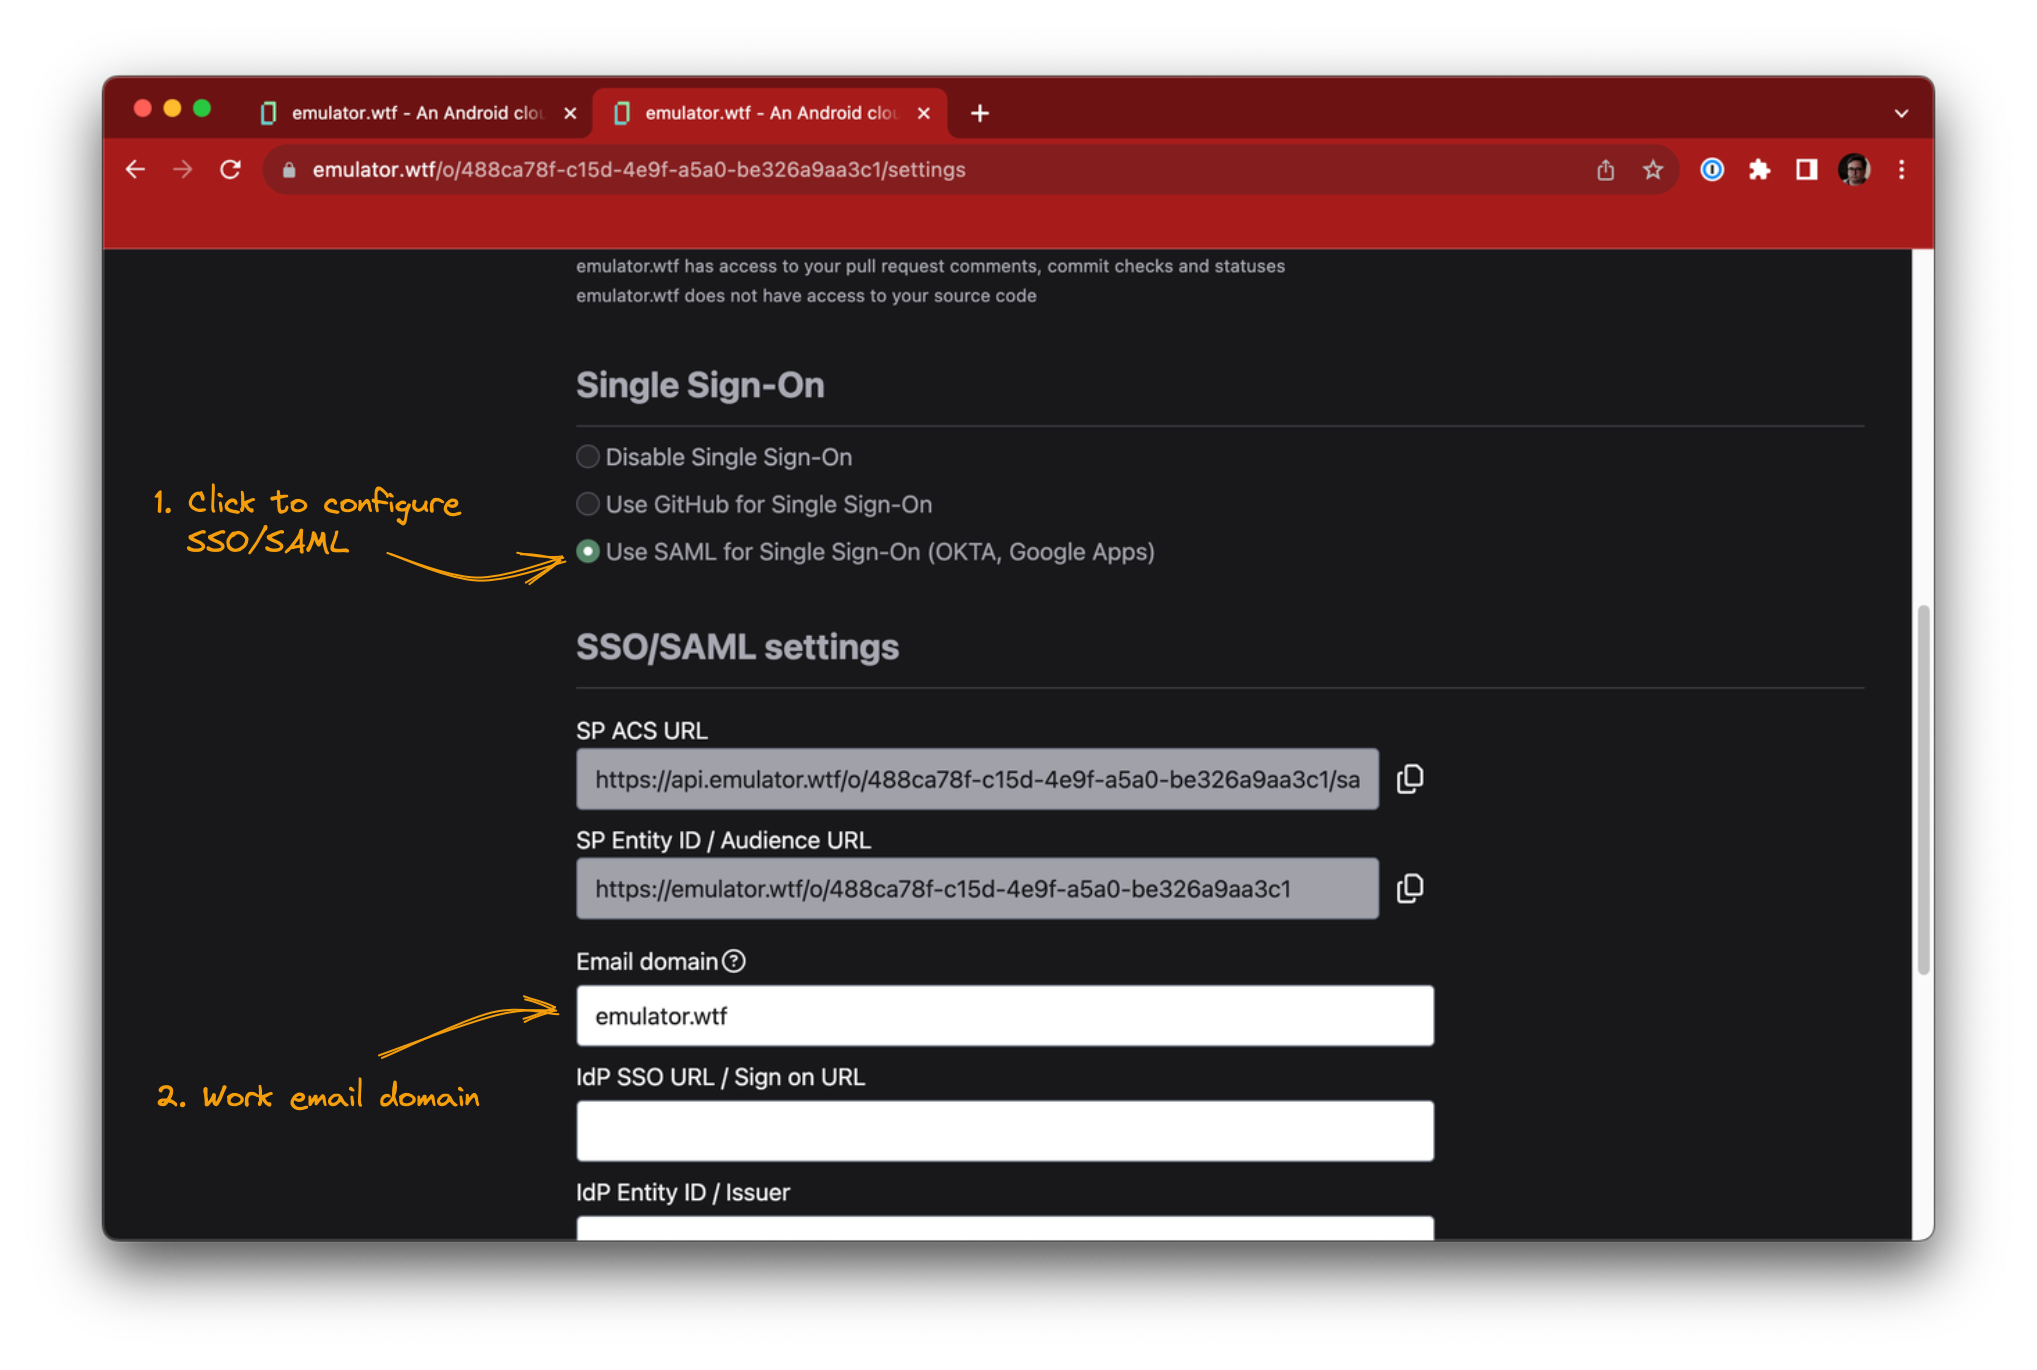
Start configuring SSO/SAML from the Settings page in emulator.wtf web app, scroll to the SSO/SAML section and click Use SAML for Single Sign-On. Specify the email domain of your organization, this will be used to direct users to the correct IdP login page when signing in.
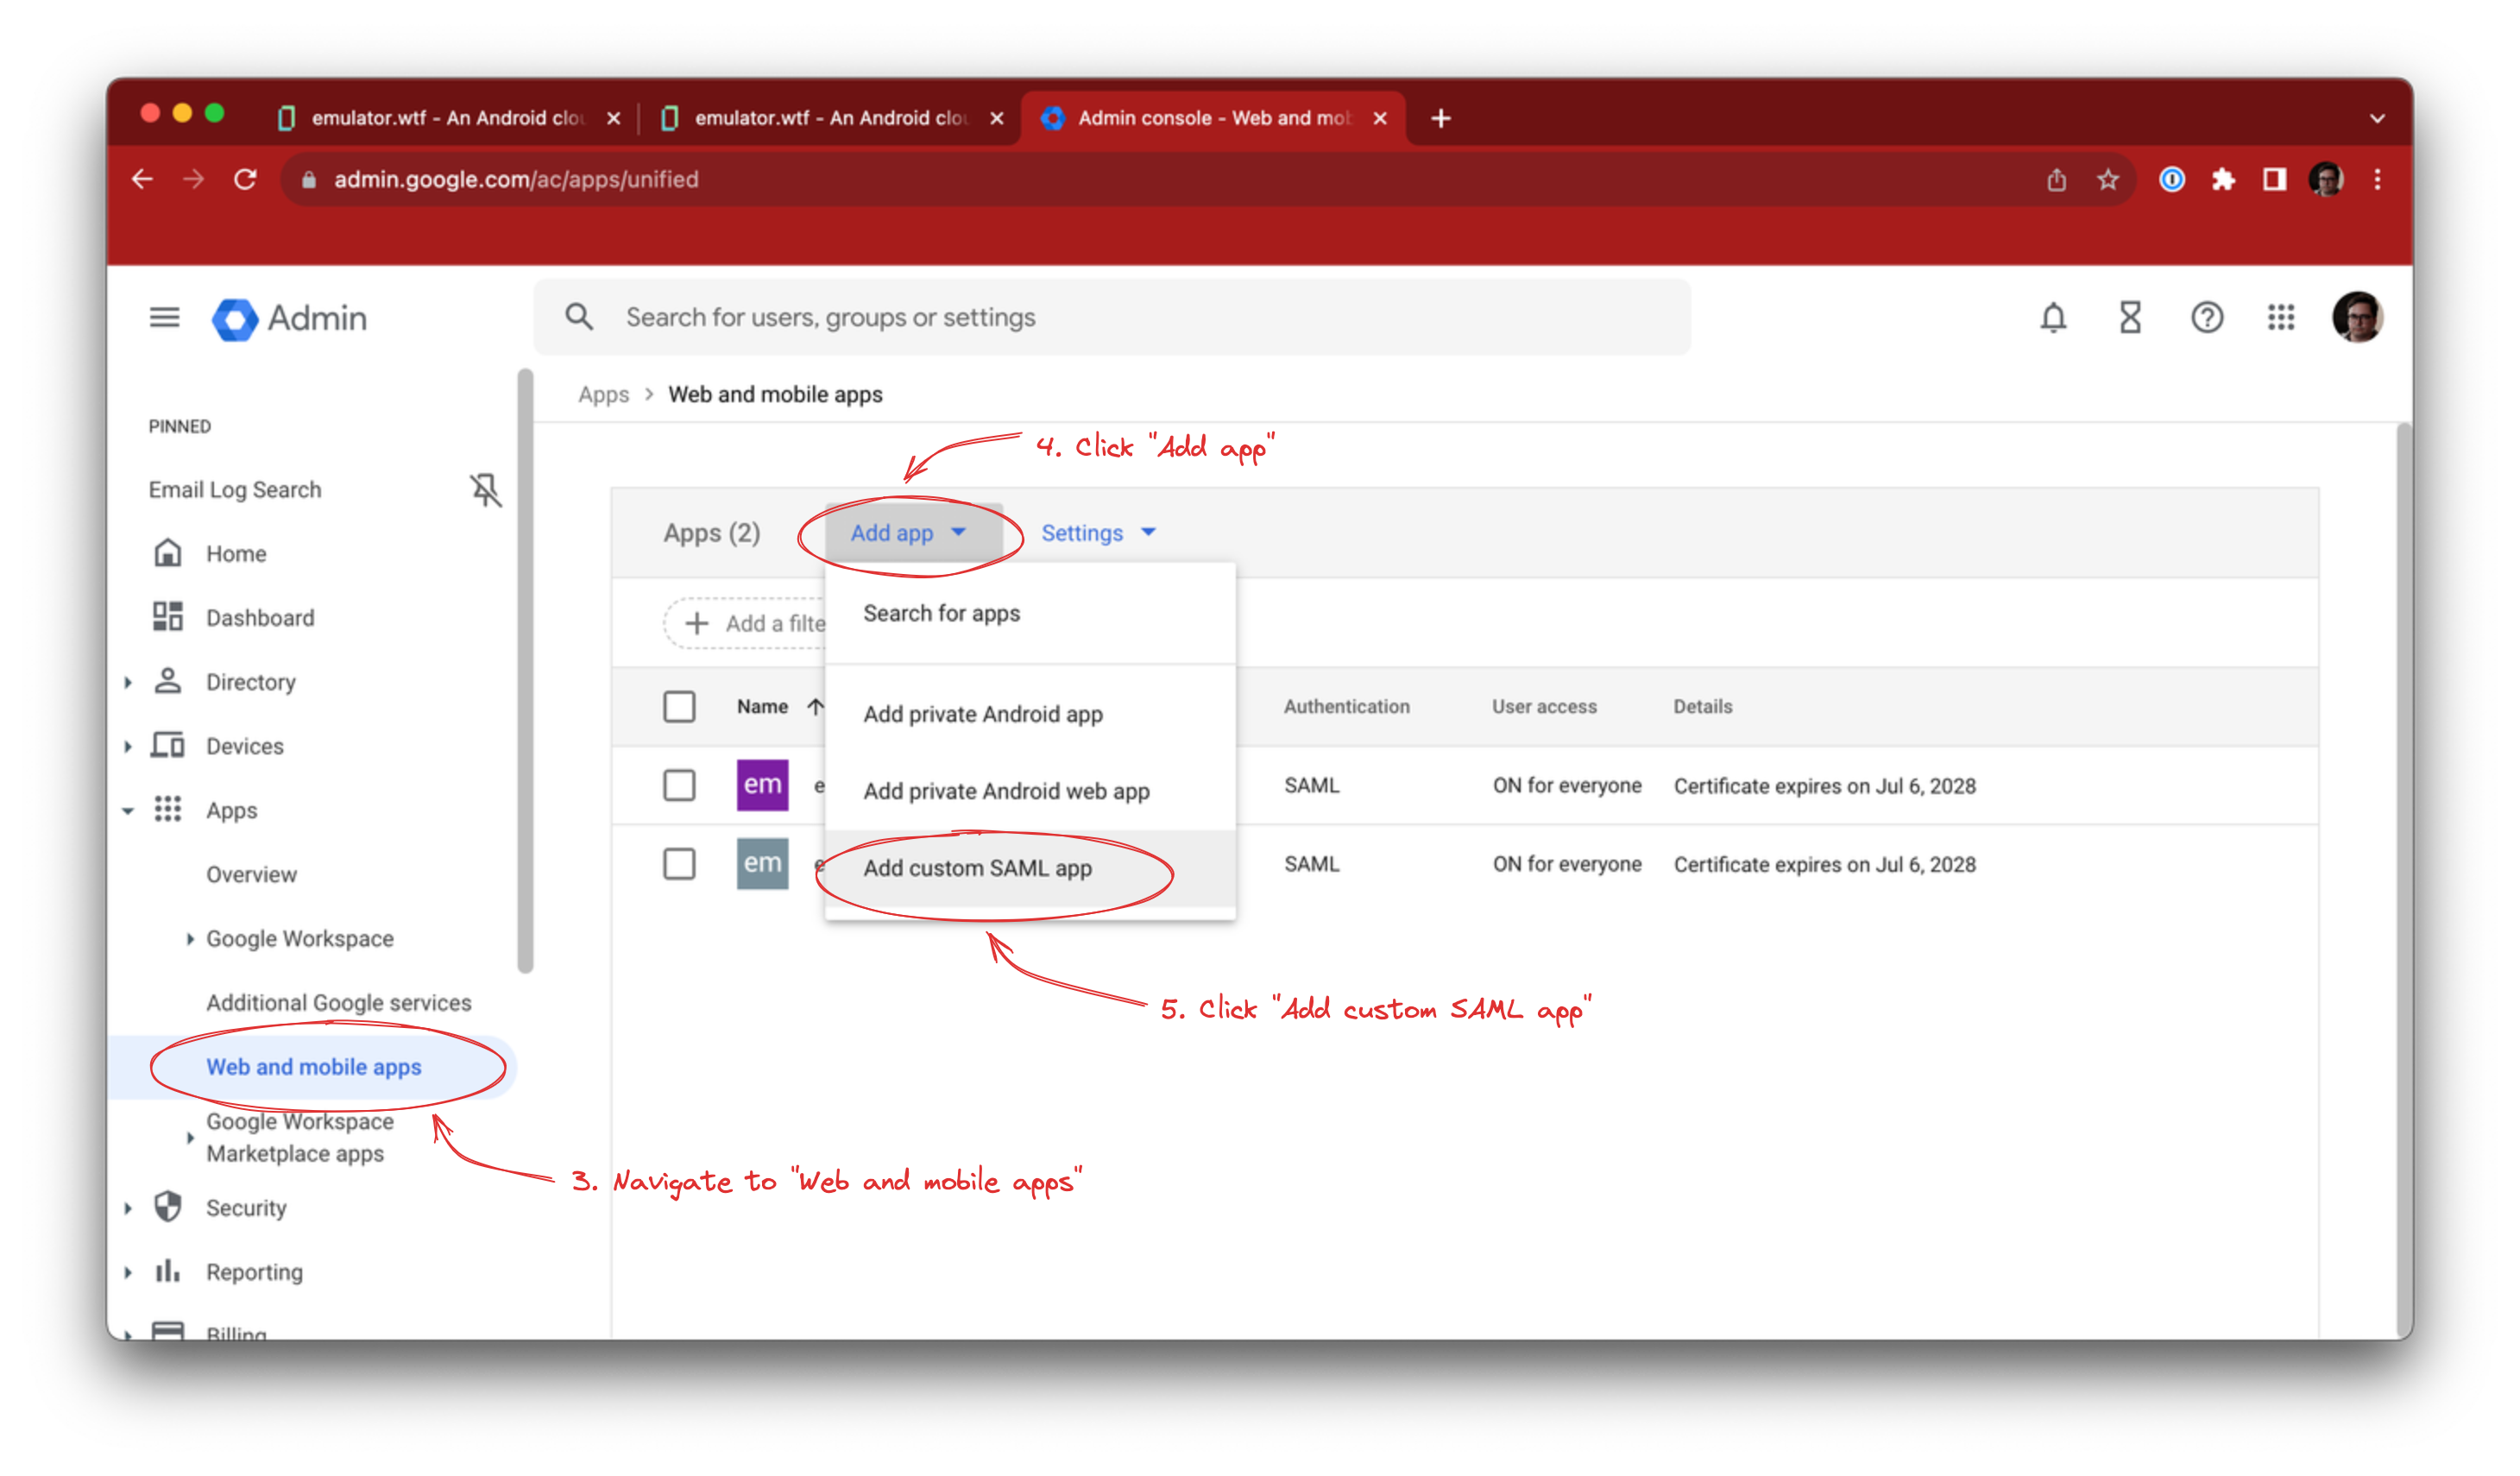
In Google Workspace Admin console, navigate to Apps -> Web and mobile apps, click the Add app button and select Add custom SAML app.
Fill in the App name, Description and optionally the logo, and click Continue:
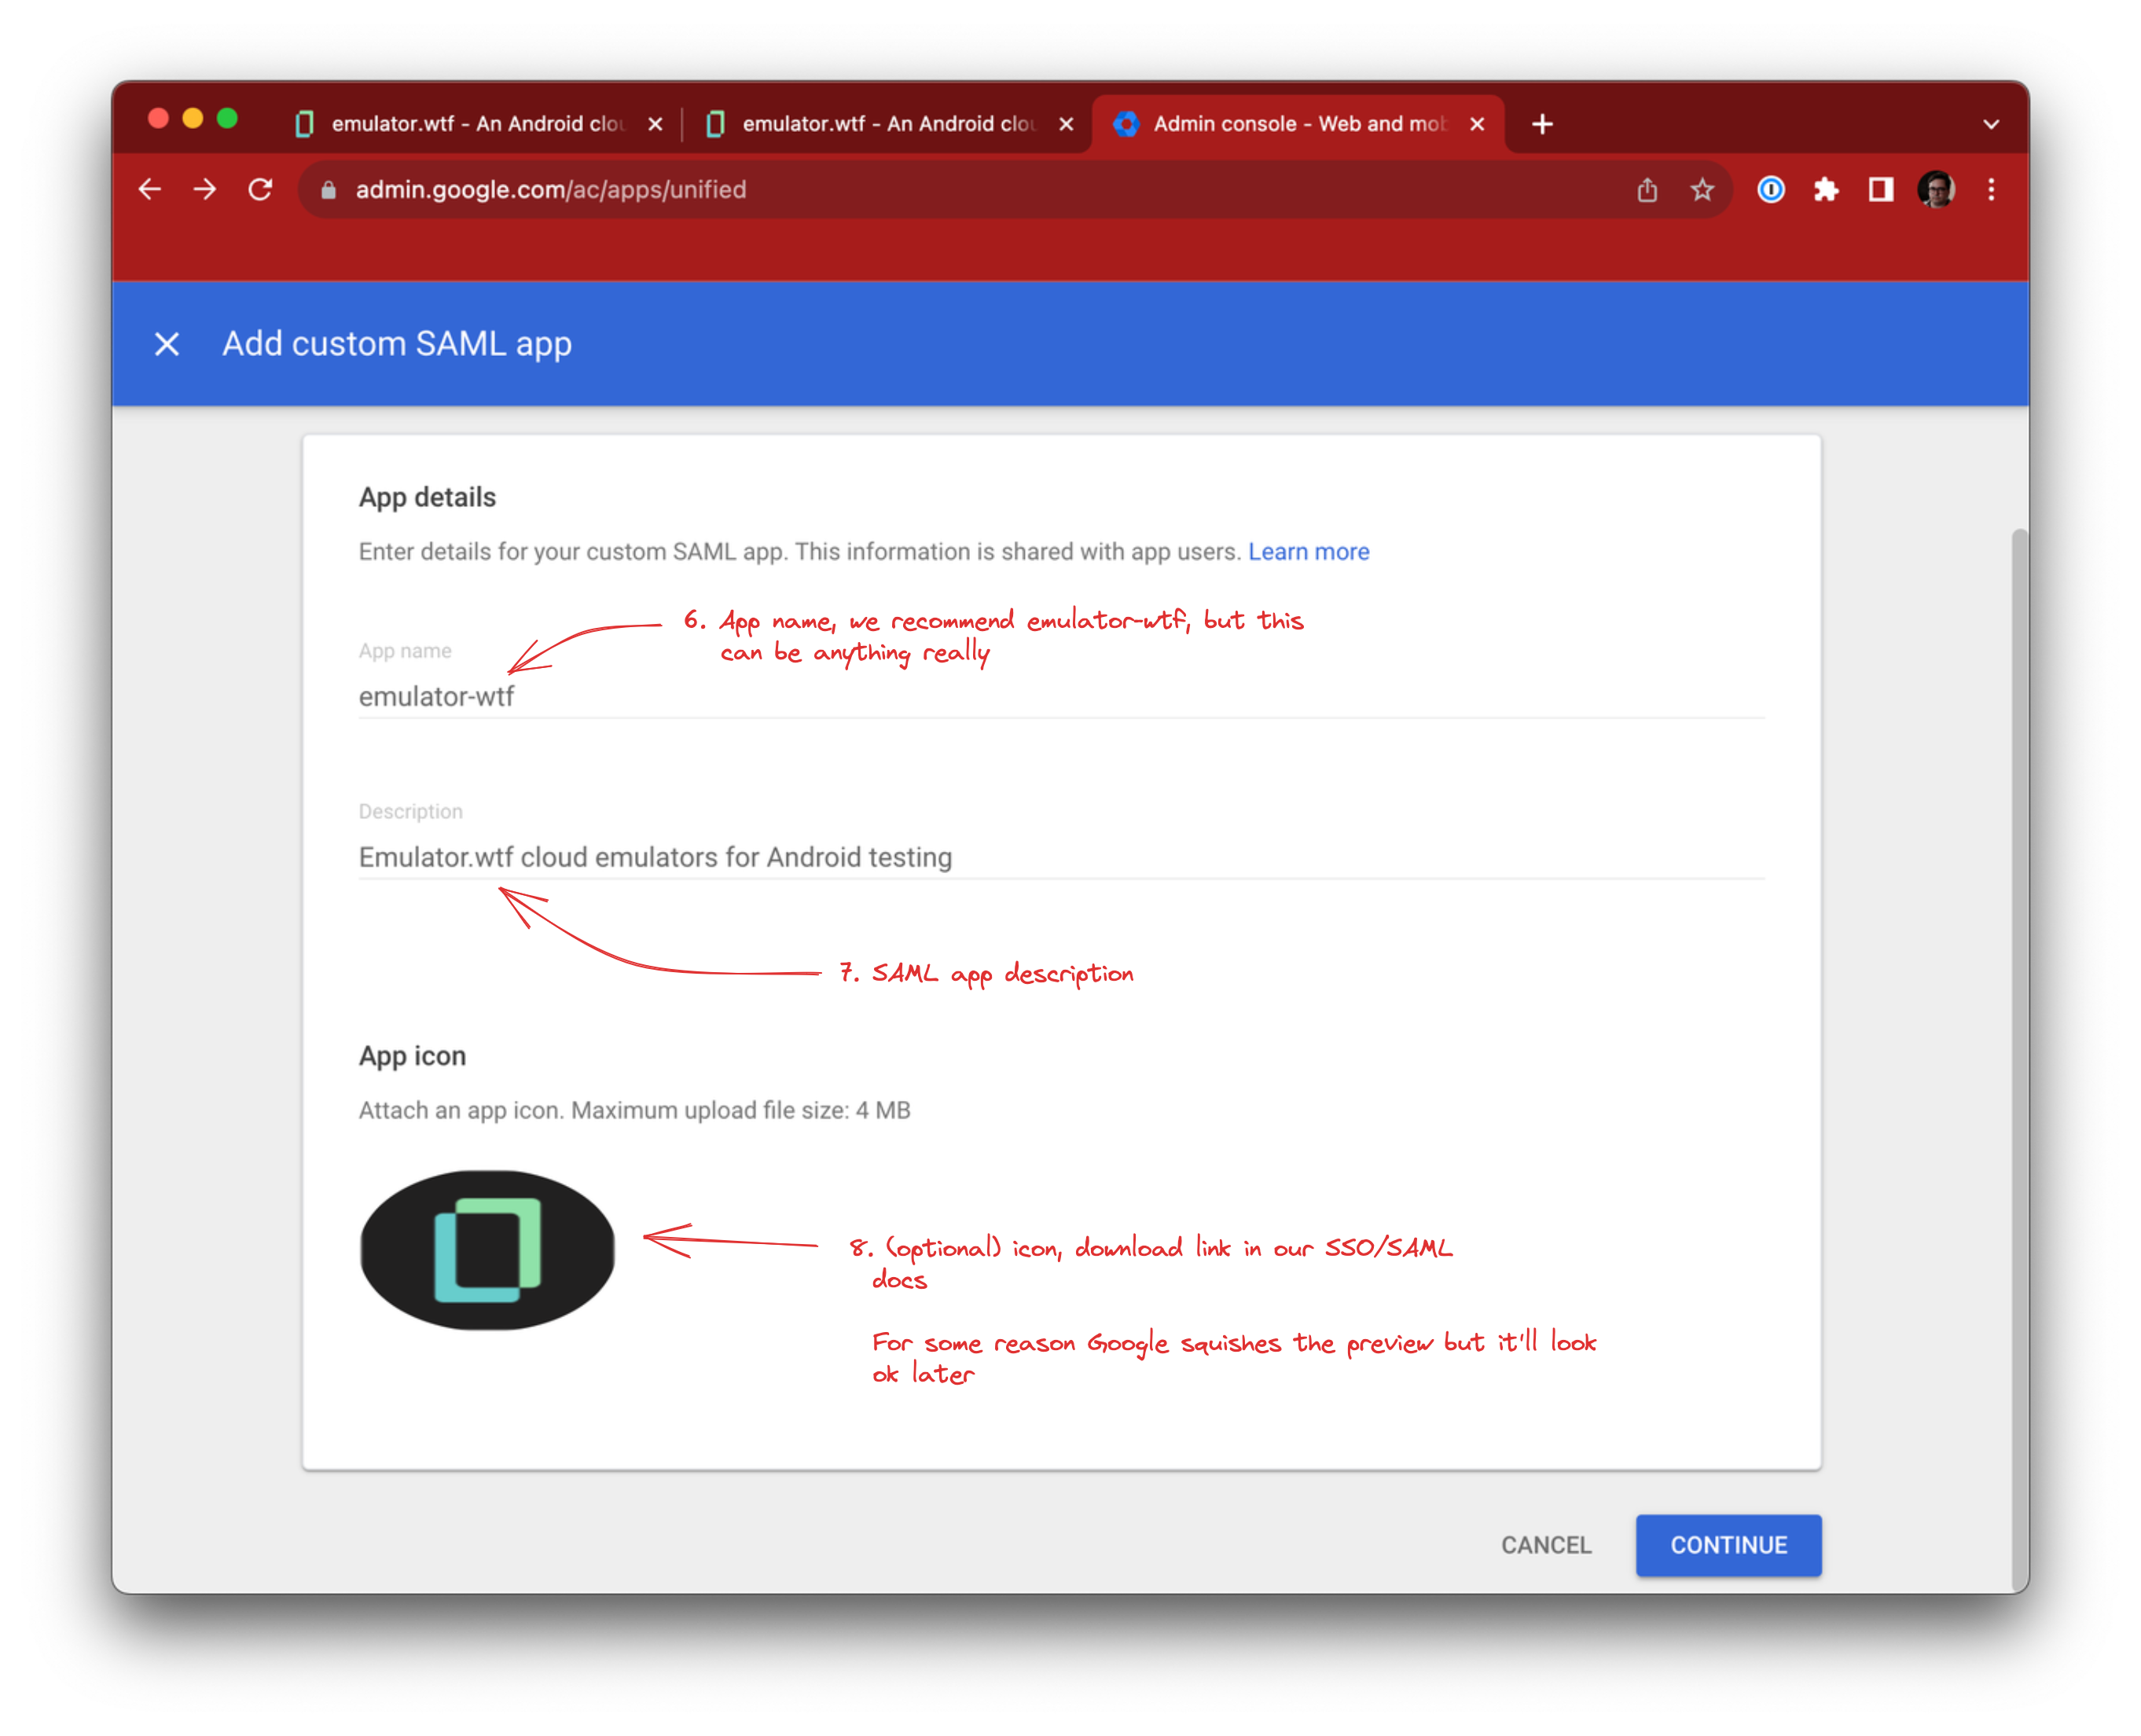
You can use this for the emulator.wtf logo:
![]()
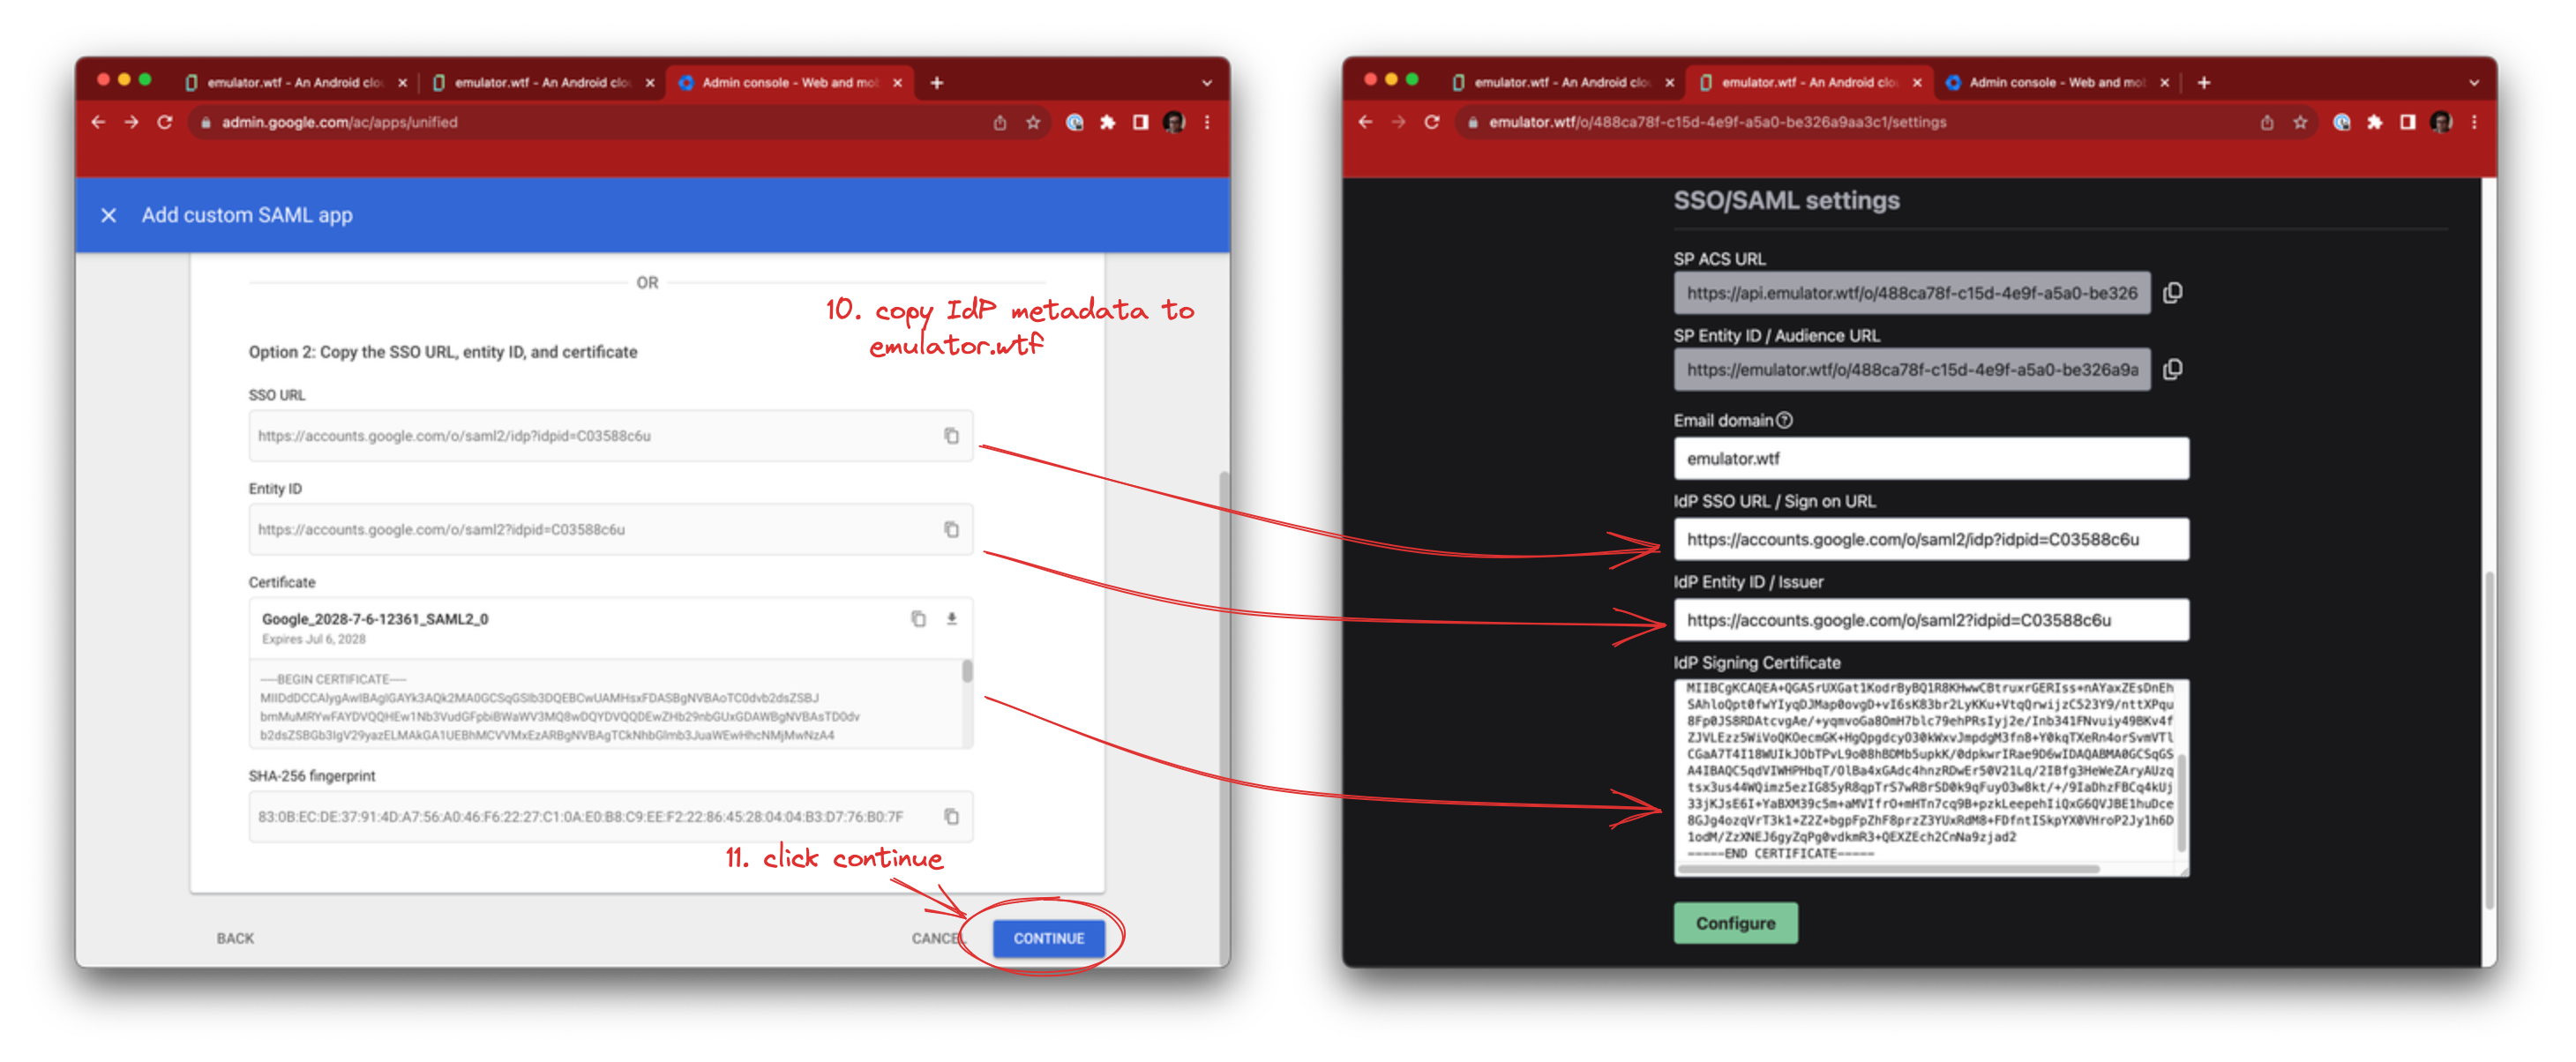
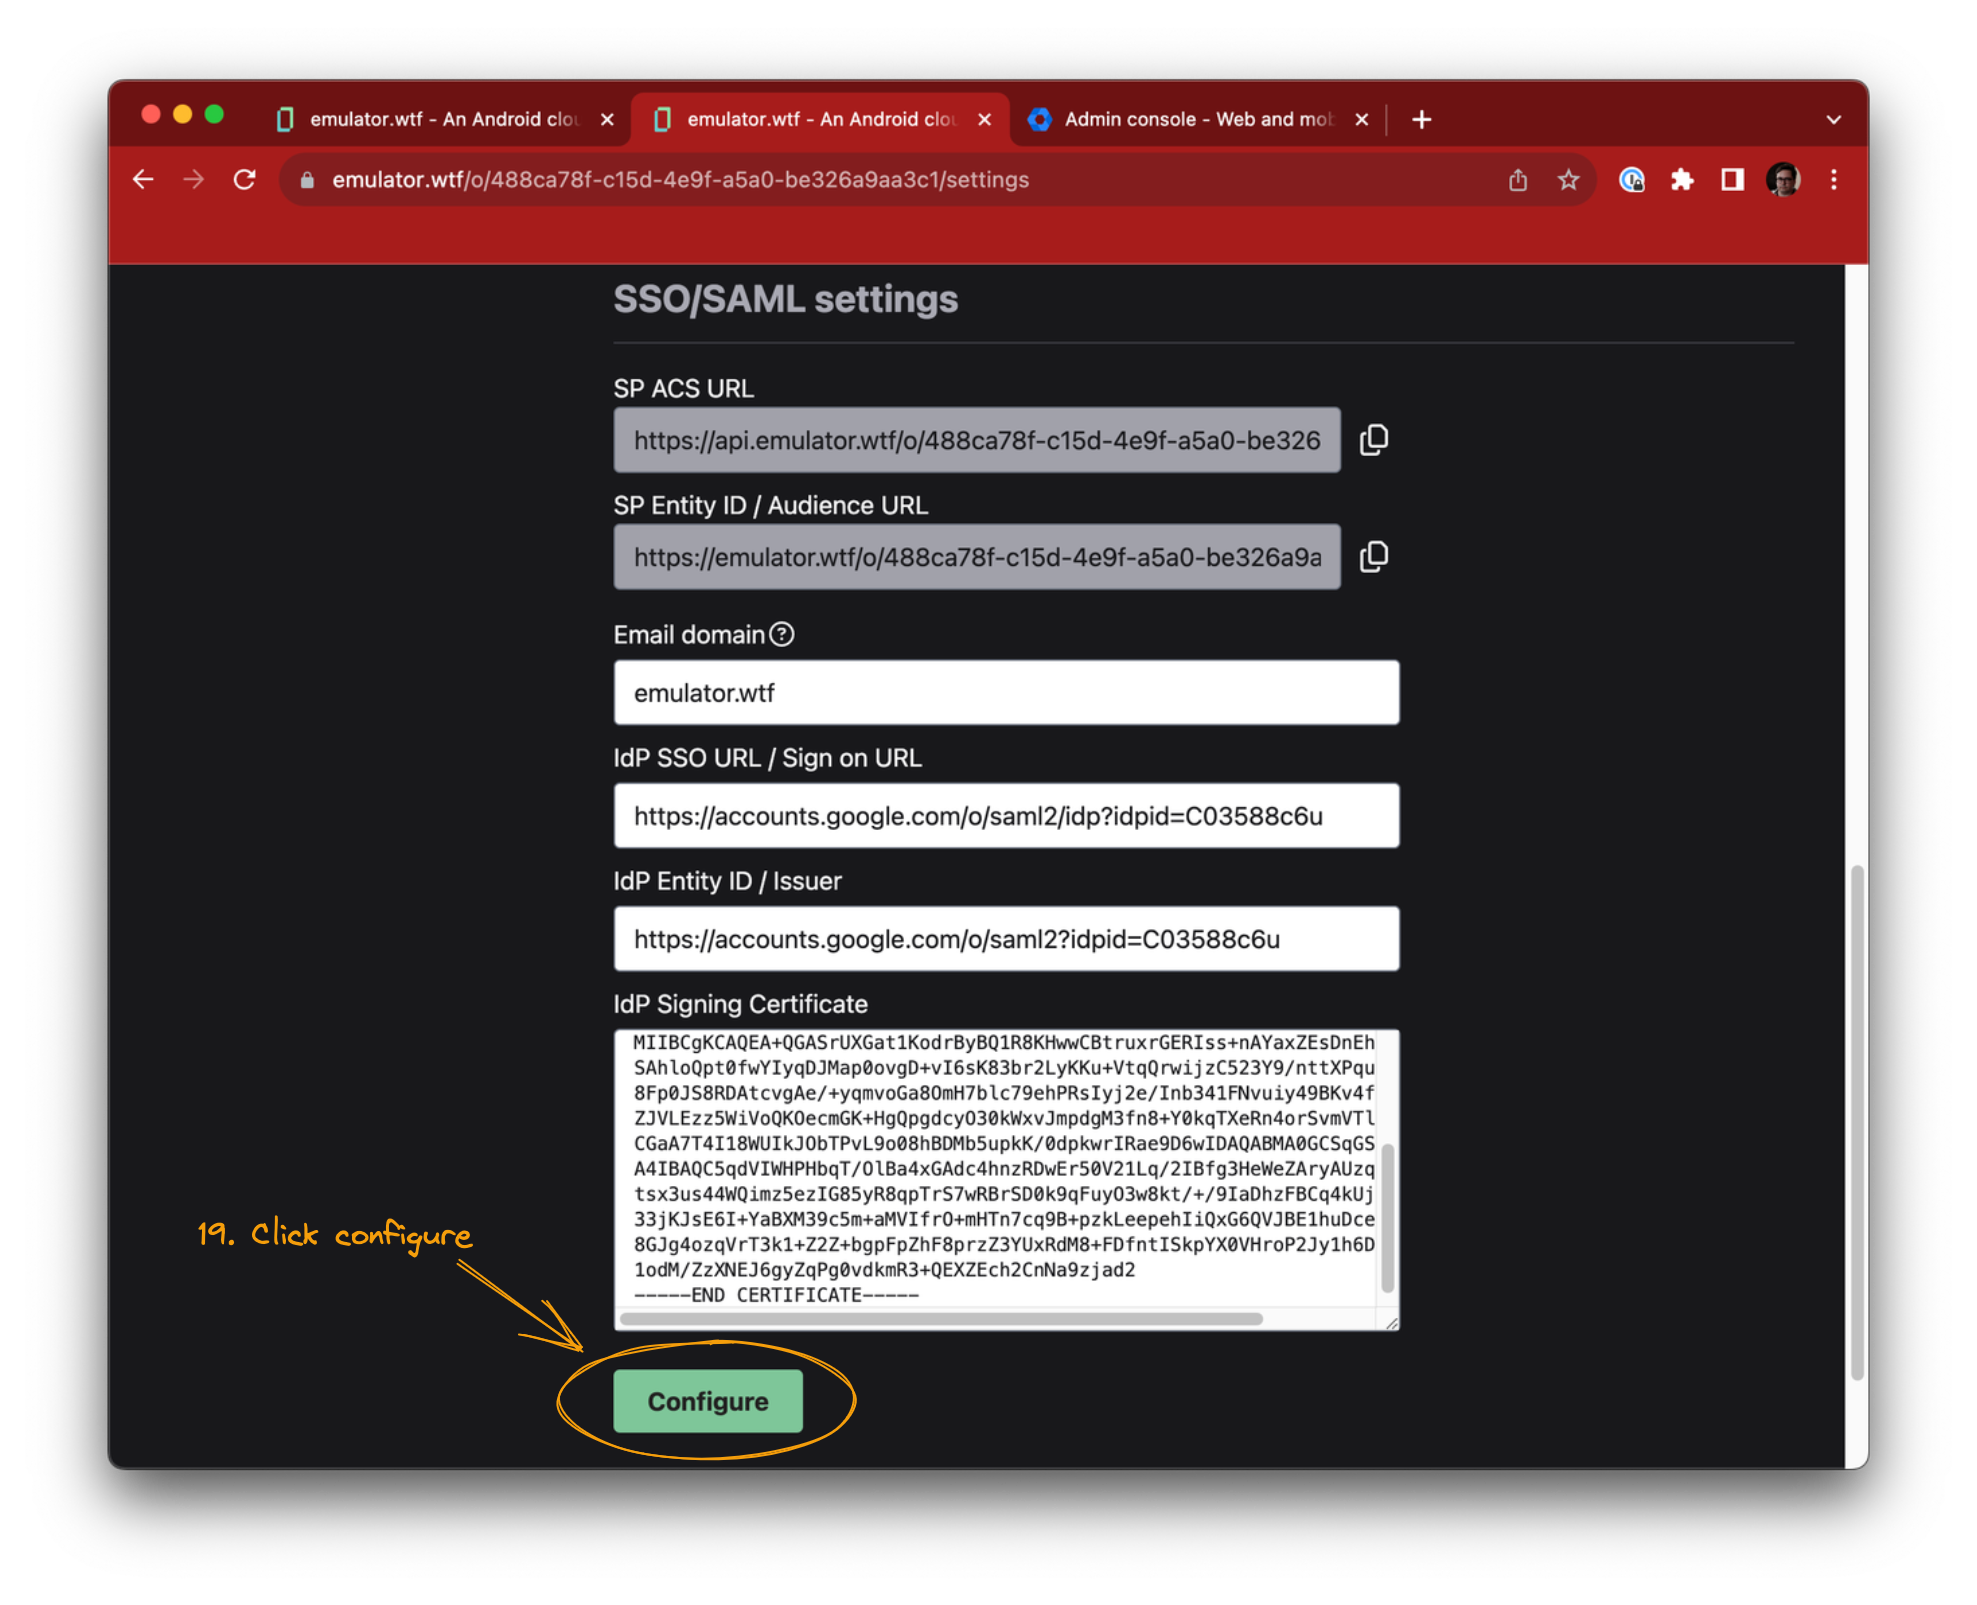
Copy over the following fields into emulator.wtf SSO configuration:
- SSO URL -> IdP SSO URL / Sign on URL
- Entity ID -> IdP Entity ID / Issuer
- Certificate -> IdP Signing Certificate
Once filled, click Continue.
Now that we have Identity Provider data in emulator.wtf, you’ll need to tell Google about emulator.wtf as well.
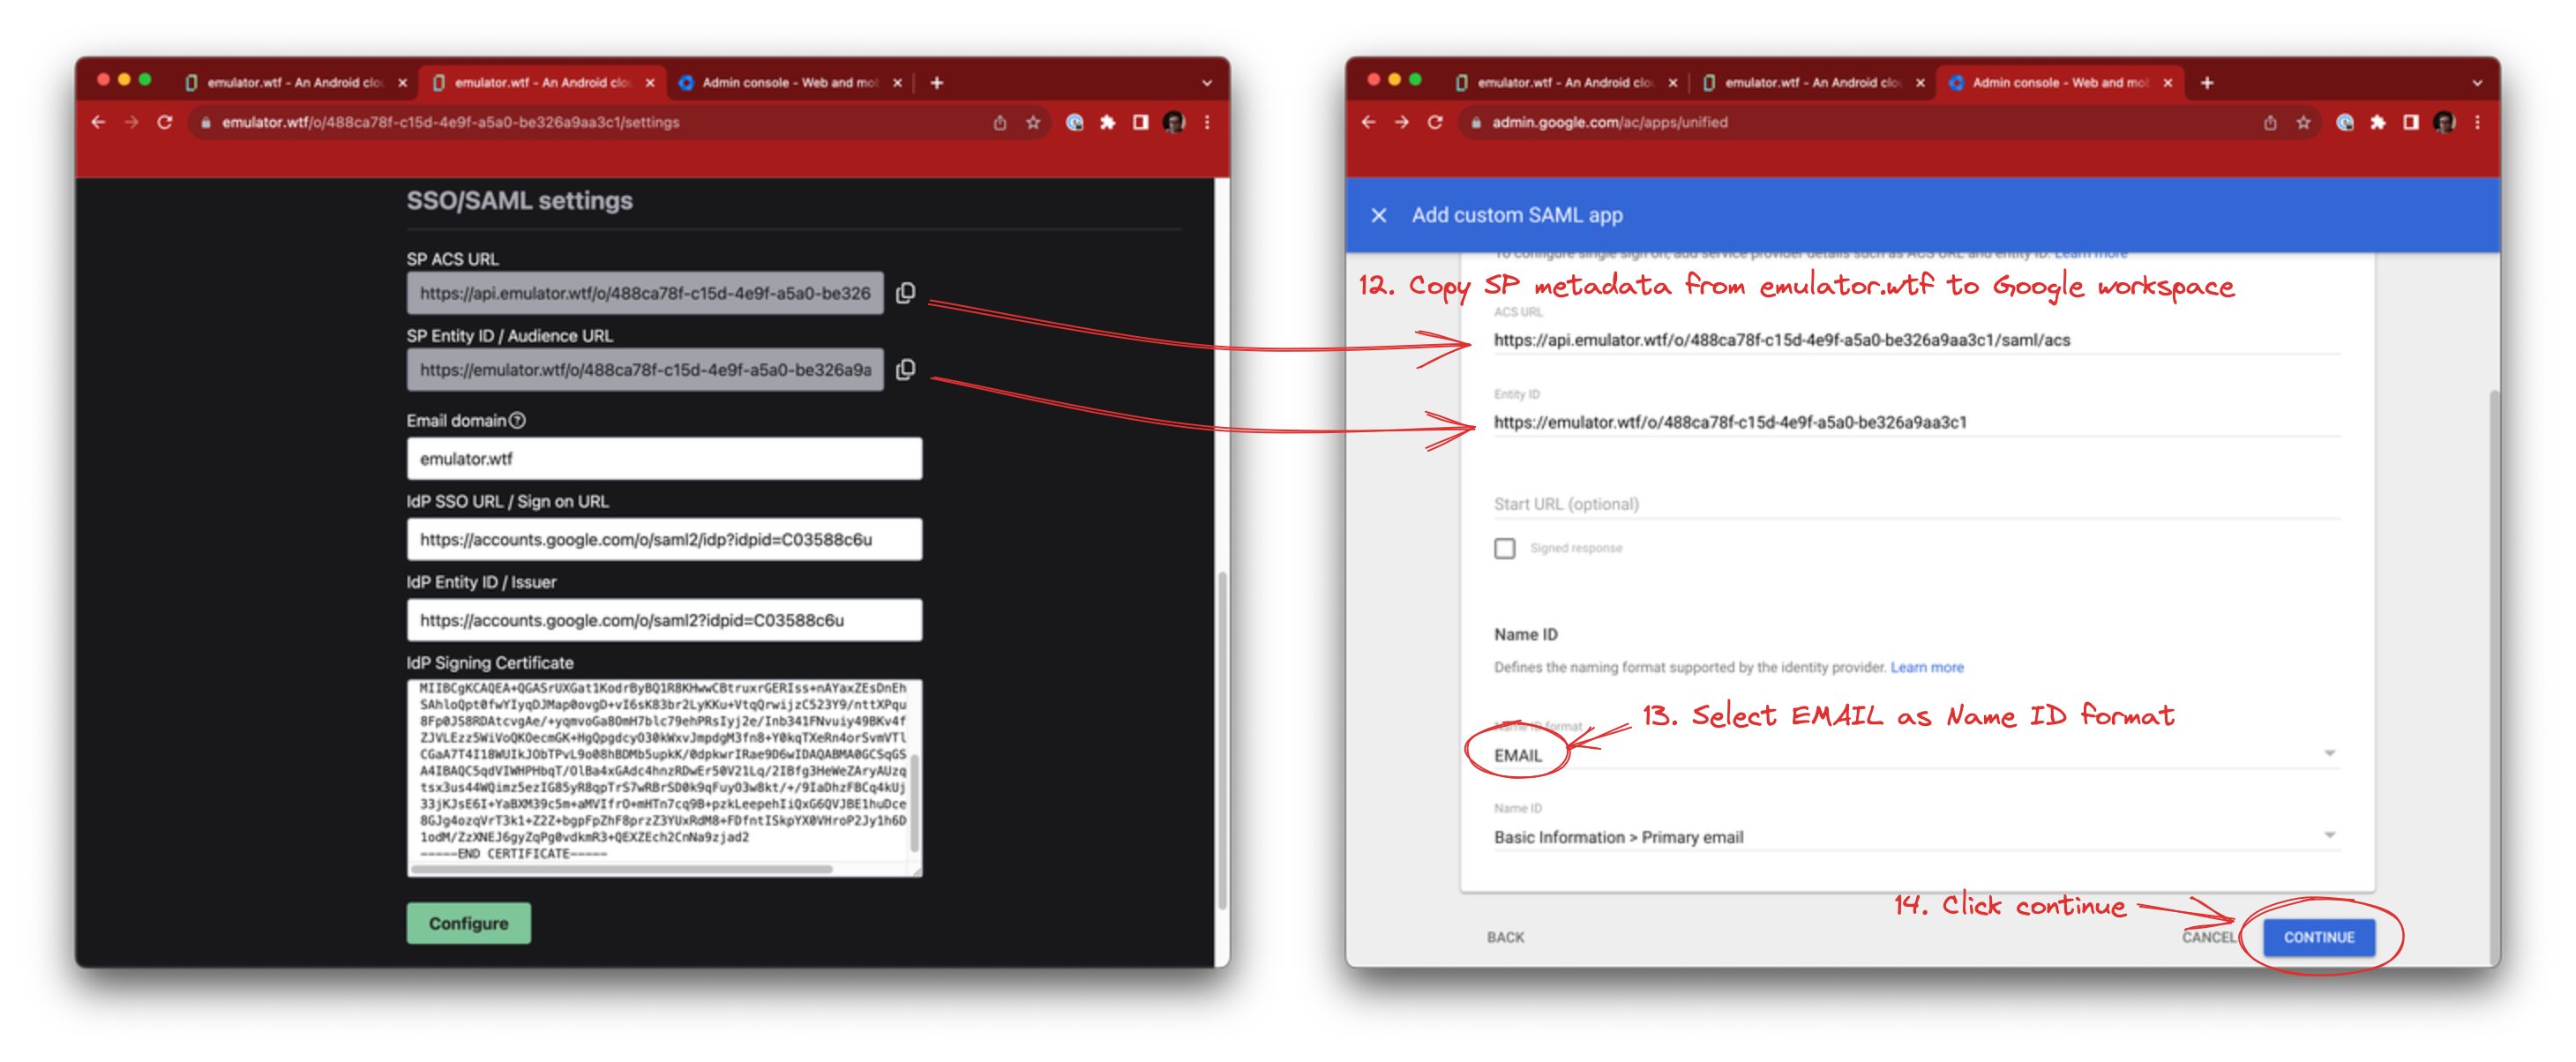
Copy the following from emulator.wtf into Google SAML app configuration:
- SP ACS URL -> ACS URL
- SP Entity ID / Audience URL -> Entity ID
Select EMAIL as the Name ID format and click Continue.
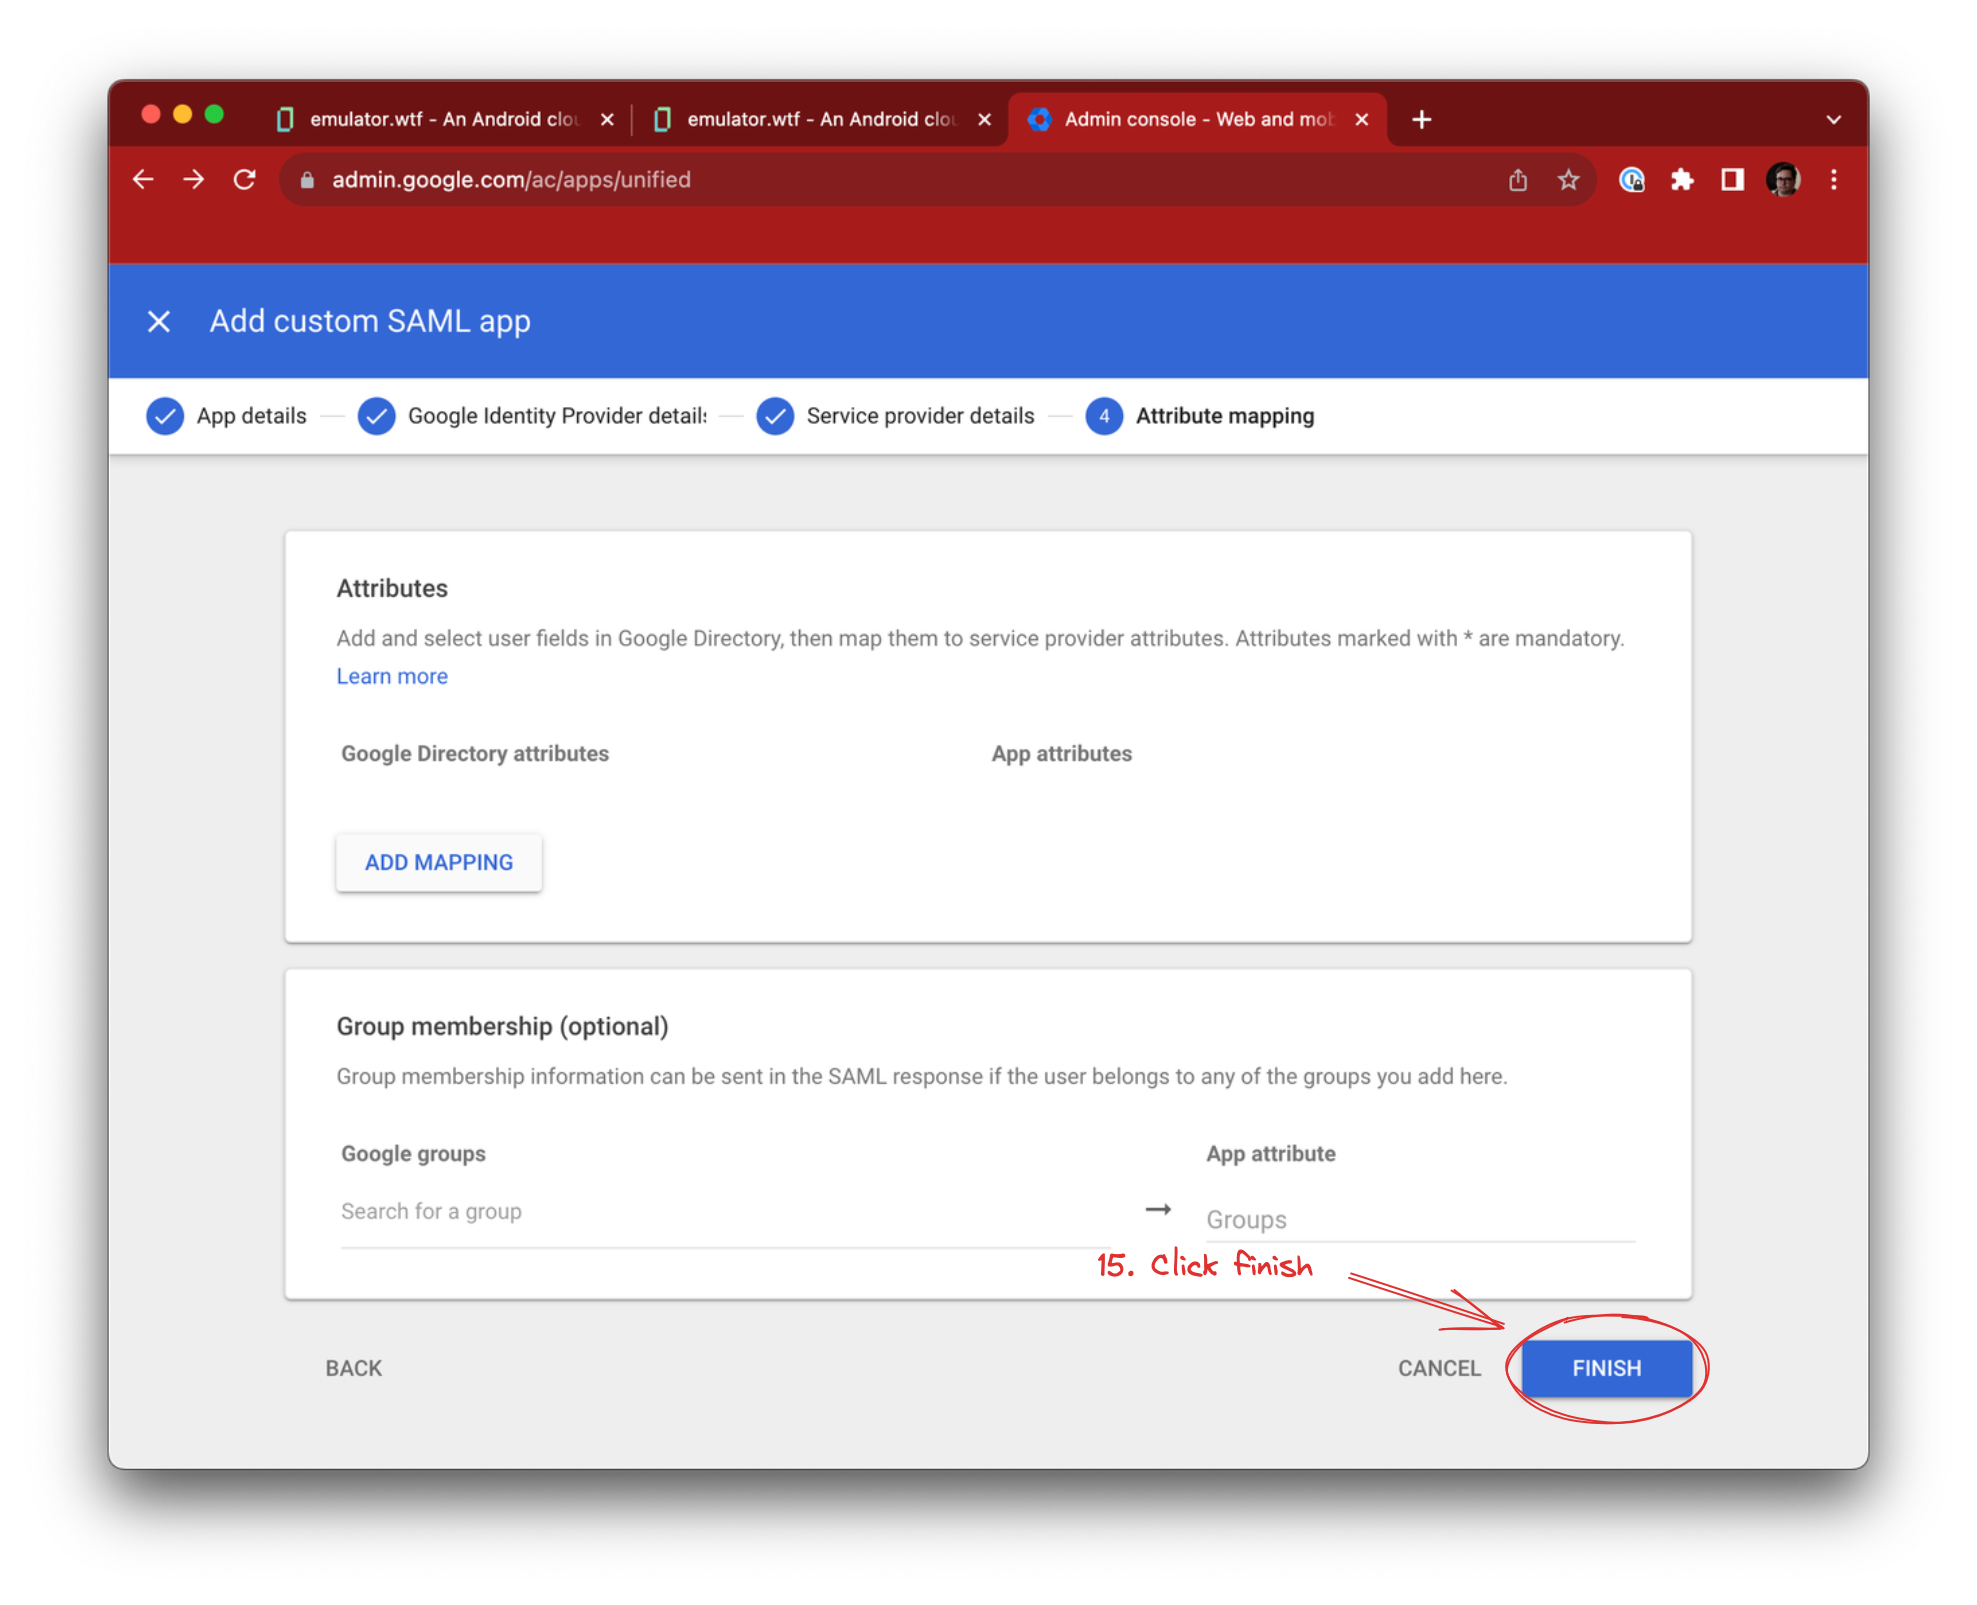
Next, Google offers to map attributes and groups. We don’t support this - yet! - so click Finish:
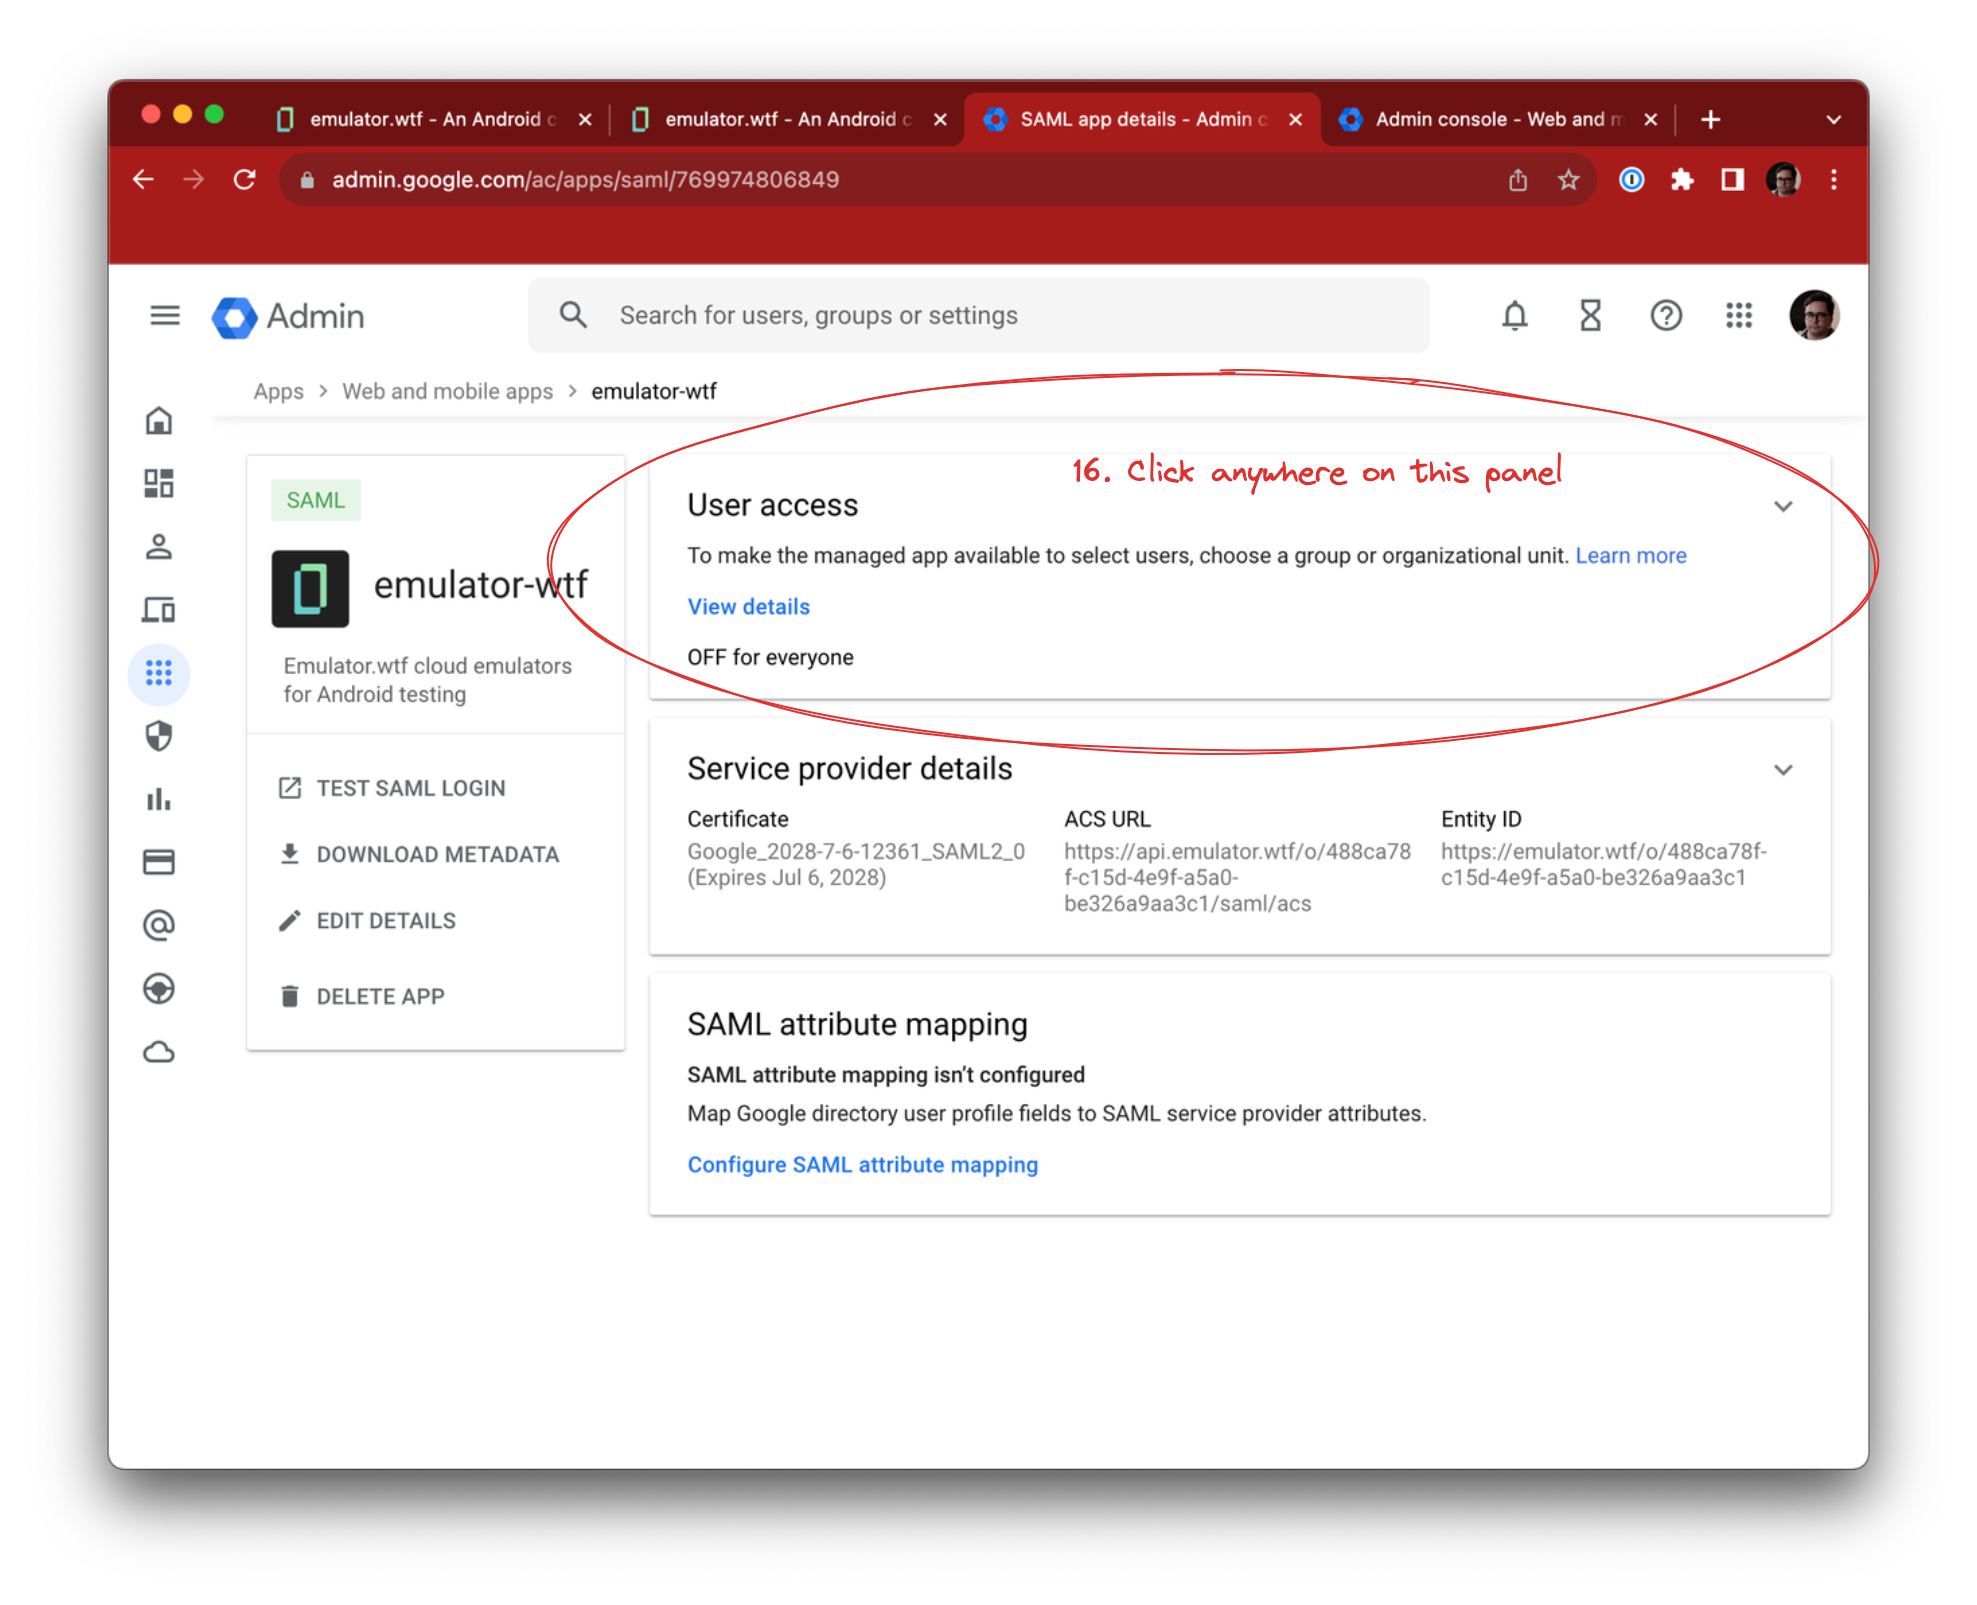
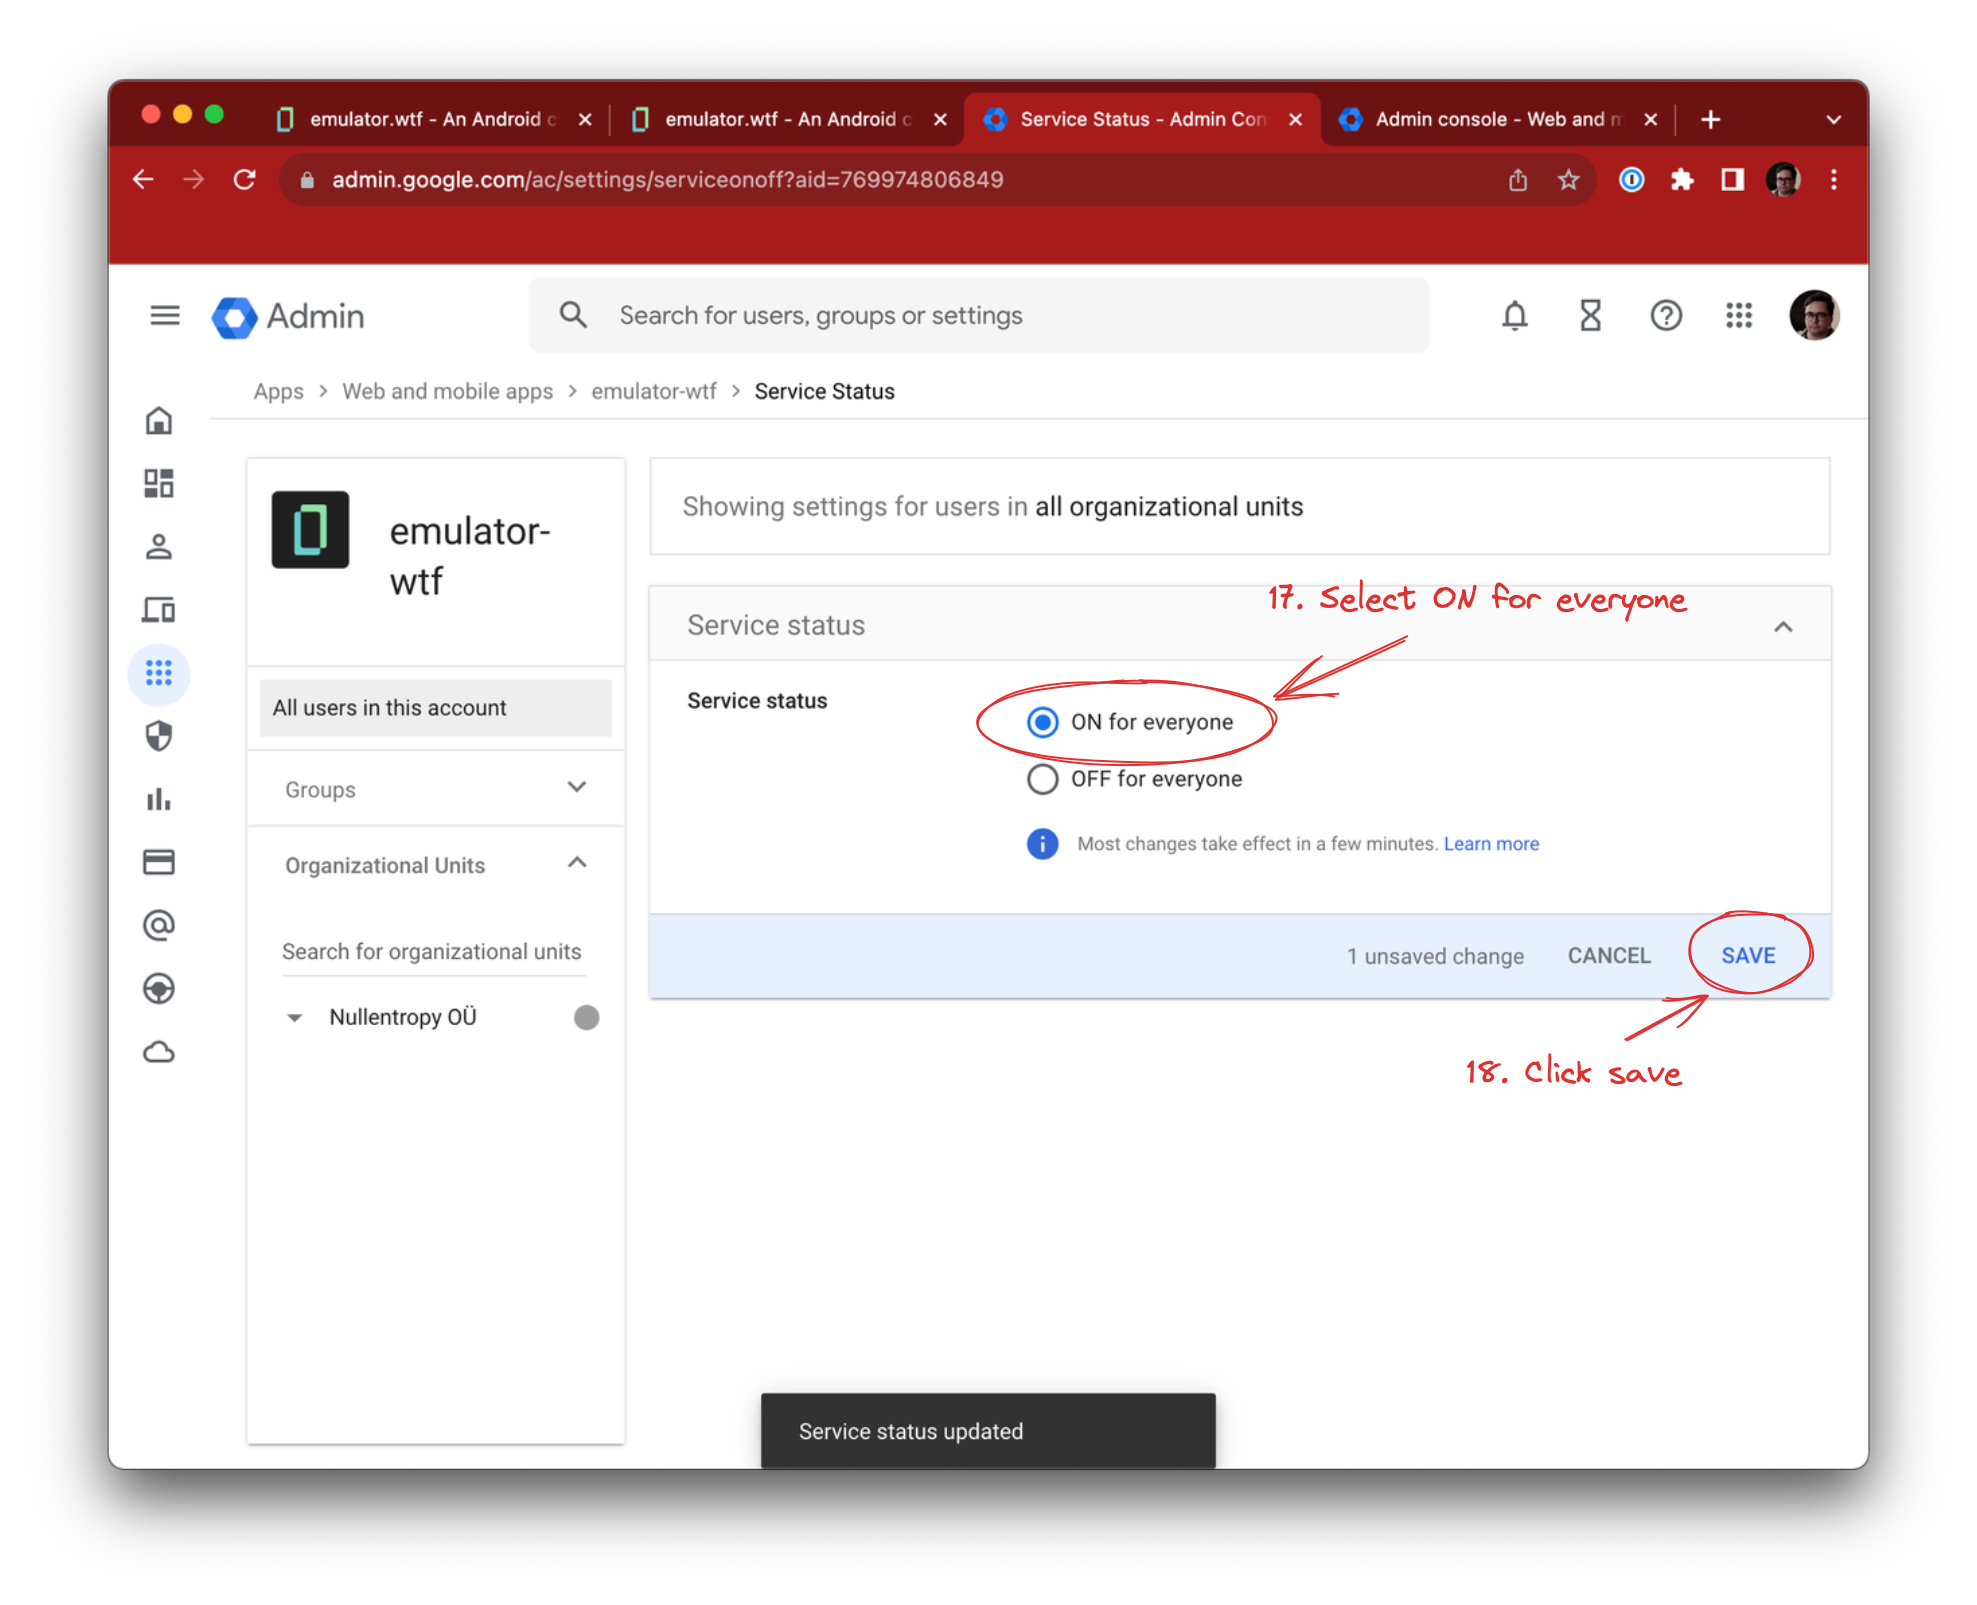
We’ll enable the app for our users. Click User access and select ON for everyone. Alternatively you can give access to specific users or groups, e.g. Android developers.
Finally, click Configure in emulator.wtf.
SSO/SAML with Google workspace is now enabled for your organization! 🎉